Thursday, August 11, 2016

Compiling SDL Apps on Mac OS X With Just a Makefile

There are wonderful tutorials for the SDL 2D graphics library on Lazyfoo.net that I found. The one thing I would change for the Mac OS instructions is to use a Makefile instead of using the build process in Xcode. I want to use Makefiles because I have more control over the build process and to remove the magical blackbox model of compiling that an integrated IDE imposes. Making a Makefile is not easy because you must link to the SDL libraries and Mac OS X packages libraries into things called frameworks instead of bare headers and static object files like other *nixs do. Mac OS X has special flags for gcc to access frameworks, but once you know the flags using Makefiles is a possibility.

Step 1: Install SDL

As of Mac OS Version 10.11 (El Capitan) Mac OS does not have the SDL library installed by default. SDL can be installed by first downloading a .dmg file on the SDL Downloads Web Page. I use SDL 2.0 for this tutorial.


Step 1.2: after opening the downloaded .dmg file drop the SDL2.framework file into /Library/Frameworks, you'll need to have administrative access to do this and you'll need to use your password to add this file. 

Step 2: Write the 'Hello World' program

Create a new folder to put this simple hello world program into. The program below is a very simple program I called main.cpp.
#include <SDL2/SDL.h>
#include <iostream>
int main( int argc, char* args[] ){
  int rc;
  //Start SDL
  rc = SDL_Init( SDL_INIT_EVERYTHING );
  if(rc){
    std::cout << "Could not init SDL" << std::endl;
    return 1;
  }
  //Quit SDL
  SDL_Quit();
  return 0;
}

All this does is open up a blank SDL instance and immediately exits. Not much of a program, but it does demonstrate that the SDL library has been installed and you can link to it, otherwise your code won't compile or you'll get the "Could not init SDL" message.

Step 3: Write your Makefile

Now you'll need to create your Makefile, again nothing too complex, just called the following file Makefile
CC=g++
EXE=setup
setup: main.cpp
 $(CC) -F/Library/Frameworks -framework SDL2 -o $(EXE) main.cpp
.PHONY: clean
clean:
 rm $(EXE)

Notice the -F and -framework flags. These are the Mac OS X specific gcc compiler flags. -F specifies a path to your frameworks (libaries) and -framwork specifies a specific framework to load. Now you're ready to build your application, go to your terminal in /Applications/Utilities/Terminal and navigate to your hello world folder. Then run make.

You'll notice that a new file setup had been created. If you run this ./setup your terminal will go out of context for a split second and return when the program exits. Congratulations! You can now build SDL applications without the need for Xcode. 

Monday, December 28, 2015

Oblique Cylinder in OpenSCAD

While working in OpenSCAD I found the need to create an oblique cylinder, which is a combination between a rhombus and a cylinder. Unfortunately there is no easy way to create an oblique cylinder (at-least in version 2015.03-1) and by easy I mean something that can be done in three lines of code.

I ended up having to create a very trigonometry heavy module to accomplish this goal. Below is the code, which I hope saves some people a few hours. 

module ObliqueCylinder(height = 1, radius = 1, angle = 0, faces = 360) {
    theta = angle; 
    m = radius * sin(theta); 
    k = radius * sin(2 * theta);
    l = radius * pow(sin(theta), 2);
    hPrime = height/cos(theta) + 2 * m; 
    
    difference() {
        translate([0, -l, -1/2 * k]) {
            rotate(a = [-theta, 0, 0]) {
                linear_extrude(height = hPrime) {
                    rotate(a = [theta, 0, 0]) {
                        circle(r = radius, $fn = faces);
                    }
                }
            }
        }
        translate([0, 0, -1/2 * k]) {
            cube(size = [2 * radius, 2 * radius, k], center = true);
        }
        translate([0, height * tan(theta), height + k/2]) {
            cube(size = [2 * radius, 2 * radius, k], center = true);
        }
    }
}

Below is the result.

Sunday, December 8, 2013

PHP script for showing computer info

For those wanting to print out information about their server to a web page: I designed the following php script to do that on a Linux server.

 <?php  
      //Removes everything before the first ':' character, meant to get information from /proc/cpuinfo  
      function extractCPUInfoLine($inputString)  
      {  
           return trim(substr($inputString, strpos($inputString, ':') + 1));   
      }  
      //Returns an array of info for the processor  
      function getCPUInfo()  
      {  
           $cpufile = file("/proc/cpuinfo");  
           $memFile = file("/proc/meminfo");  
           $cpuinfoArray = array();  
           $cpuinfoArray["cpu"] = extractCPUInfoLine($cpufile[4]);  
           $cpuinfoArray["speed"] = extractCPUInfoLine($cpufile[7]) . " Mhz";  
           $cpuinfoArray["cache"] = extractCPUInfoLine($cpufile[8]);  
           $cpuinfoArray["memory"] = extractCPUInfoLine($memFile[0]);  
           return $cpuinfoArray;   
      }  
 ?>  

 <html>  
      <head>  
           <meta http-equiv="content-type" content="text/html; charset=ISO-8859-1">  
           <title>Server Info</title>  
           <link rel="stylesheet" type="text/css" href="style.css">  
      </head>  
      <body>  
           <h2>About This Server</h2>  
           <?php  
                $cpuInfoArray = getCPUInfo();  
                print "          <table>  
                <tr>  
                     <td>CPU</td>  
                     <td>" . $cpuInfoArray["cpu"] . "</td>  
                </tr>  
                <tr>  
                     <td>CPU Speed</td>  
                     <td>" . $cpuInfoArray["speed"] . "</td>  
                </tr>  
                <tr>  
                     <td>Memory</td>  
                     <td>" . $cpuInfoArray["memory"] . "</td>  
                </tr>  
                <tr>  
                     <td>Cache</td>  
                     <td>" . $cpuInfoArray["cache"] . "</td>  
                </tr>  
                <tr>  
                     <td>Total disk space</td>  
                     <td>" . number_format(disk_total_space("/home") / (1024 * 1024 * 1024), 3) . " Gb</td>  
                </tr>  
                <tr>  
                     <td>Free disk space</td>  
                     <td>" . number_format(disk_free_space("/home") / (1024 * 1024 * 1024), 3) . " Gb</td>  
                </tr>  
           </table>";  
           ?> 
      </head>  
 </html>  


This script will print out the CPU type, speed, memory size, cache size and total and available disk space.

The trick is that within most Linux systems there are files under the /proc directory, such as procinfo and meminfo, which tells you information about your computer's cpu and memory. Getting basic computer info is a matter of reading those files.

Monday, January 14, 2013

Why Free Software Will Sell Our Kids Short


A petition to the White House, asking the Obama administration to promote the use of Free Software, has recently received 3,000 signatures. The petition advocates that schools should be encouraged to use free software and the Linux operating system instead of "mysterious and opaque" proprietary software, however the action this petition proposes will be detrimental to our children's future in the growing digital economy.


Linux was created by Finnish computer hacker Linux Torvolds in the early 1990s. The operating system Linux was an unlicensed copy of an industry operating system called Unix, created by Bell Labs in the 1960s. Unix was sold to large corporations and banks, which made it prohibitively expensive to a young computer hacker. So Mr. Torvolds created his copy in his spare time. Today Linux has become a favorite operating system of hackers world wide and lies at the core of knockoff smartphone brands like Android.

The main problem with Linux, and free software in general, is quality. In 2009 Microsoft invested nearly $9 Billion in research and development. By contrast free software is developed by hackers and computer enthusiasts in their spare time. It may be difficult for most people to understand, especially those who choose to pirate their software, but programing software is a very expensive and time consuming process. How can free software measure up to the standards of large American companies that employ college graduates? The only two outcomes of Free Software is that it is either substandard or illegal.

Assuming Linux is both high quality, legal and free where is it? I can guarantee you that no device in my house runs Linux and we have 3 computers. If you walk into a store, where can you buy a Linux PC? Speaking of which, where is Linux in advertising? You don't see any Mac Vs. PC Vs. Linux ads on TV (by the way I have no preference to either Macs or PCs, I think they both have their distinct uses). The reason for this is that Free Software doesn't have a business model. You can't make money just giving away software. Without a business model you don't see advertising or a presence in retail outlets. Without a business model free software has no incentive to serve its customers like proprietary software does. Linux is not as great as Windows or Apple because the lack of business model doesn't provide any incentive to give the customer a great product.

The lack of a business model in Free Software is detrimental to its users. I decided to install Linux on an old Laptop I had to see what our nations' kids would be getting into. I did my research and found a version that was touted as being user friendly for beginners: Ubuntu Linux. The installation process went alright and when I rebooted my computer it looked very similar to the Apple operating system, but immediately I knew something wasn't right. Apparently I needed to install special drivers for my wireless? It didn't come on the CD apparently. The only way to install the drivers was through an ethernet cable, something I hadn't used in years. I had to dig around in my garage to find the one I used when I had a Desktop. Now here's the problem: why do you need to already be connected to the internet to get an internet connection? Nobody working on Linux realizes this obvious catch-22? My old laptop had an ethernet plug on the side but more modern laptops are so thin that they don't even have one. I worry this is indicative of the quality of the Linux software and that the developers ignore the needs of common computer users.

Assuming you can get Linux working, most worrisome is the fact that Linux doesn't have the software we're used to using. Most businesses use Windows PCs, a lot of creative enterprises and colleges use Macs, I see some retailers at the mall who can swipe credit cards on their iPhones. Linux isn't at any of these places. I did some research and found that common software, used in industry, isn't available. Instead of Microsoft Office or Photoshop, Linux has pale imitators like LibreOffice and Gimp. In our high tech globalized world our kids need skills to compete. How are they supposed to do that if they grow up using something called LibreOffice? A typical job opening today receives hundreds of applicants. HR departments look for any reason to cull that number to about a dozen. If your daughter wants to be a secretary but doesn't have Microsoft Word on her resume how is she even going to get an interview?

Is Linux right for our kids? Linux isn't developed by a single respectable corporation, it doesn't have the investment that being developed by a company would give it, it doesn't have the direction or spirit to compete that a business model would give it, it lacks ease of use and it doesn't support programs used in industry. The core of the problem of Free Software is its decentralized nature. It isn't guided by any one organization and doesn't have the capacity to compete. We know Microsoft will develop great products for business, we know Apple will develop thin innovative new gadgets. Where's the drive behind Linux, what is it there to do? With no one really in charge of Linux how do you know that development will continue? With paid software they always come out with new versions every few years because they know we will buy it. I say don't endanger our kids with the radical notion of depending on Free Software, they deserve quality software.

Friday, December 21, 2012

Android App for Photographers

I had found out recently that my mom had an old 35mm SLR, with some really great lenses, that I didn't know about. Since she wasn't using it she let me borrow it. 

Thanks Mom
One problem I had was what should I set the film speed too? 

Usually a digital camera would just do this for me

Well I found a nifty equation that relates ISO speed, aperture, luminance and exposure time on Wikipedia. 


Where N is the aperture (f-stops), L is luminance (lux), S is the film speed (ISO) t is the exposure time (seconds) and K is a constant (14 for Pentax cameras). 

I could find N, K and S fairly easily as they were given, but what about L? I didn't have a lux meter lying around. But, I did have an Android device with a light sensor and found out there were free lux meter apps

But the apps had adds in them! 

Then I found out that it was a pretty trivial excise to get light sensor data and print it to the screen. Since Google has made the Android app development environment pretty open all I had to do was fire up my Eclipse IDE and make my own lux meter app. 

And I did, but why stop there? Since I eventually wanted to calculate the ideal exposure time for a scene and I didn't really want to do the calculations every time I wanted to take a shot, I decided to extend my app to let me input aperture, film speed and the calibration constant and my phone would detect the luminance and calculate the exposure time for me. 

It took me about an evening to relearn the Android API and implement that well defined functionality. 

Pretty cool huh?
I put a large button on the bottom to let the user press to sample the luminance because most light sensors are on the face of the device, which means that the user must point the screen away from them to sample the luminance from their subject. A really big button would let them press somewhere on the bottom of their screen to do that. 

I decided at this point to actually make this an actual app at this point. Which meant designing a logo. And I, of course, chose a camera diaphragm for the logo because nothing says photography like a diaphragm. 

Surprisingly it took more math to design the logo than the app actually used. 

I swear these are not satanic symbols
Once I mapped all the coordinates for all the triangles in the diaphragm I wrote the image in an SVG file and rasterized it to a png. 

It's like the logo of some '60s Bond villan's criminal organization
At this point I had to think about licensing, since this was a pretty trivial app I'm sure there is a lot that could be done to improve it, so I decided to license it under the GNU General Public License to ensure that it would always exist to let people use it how they want and modify it to fit their needs. 

One curious thing: this decision forced me to make the app's underlying code better. Since people might look at the source code I made I felt that the code represented myself as a developer and I want to give the best impression I can. So I removed as much redundant code as I could, separated classes into their own separate files, commented key parts of the code and remove hard coded values. I basically wanted to make it a model Android app. 

That took a few days but I'm confident to say that this is the best work I can deliver. 

So without further deliberation, I present my Android exposure time calculator:


And if you're inclined you can download the source code too. 


I haven't put it up on the Play store. The developer application costs $25 and I haven't decided if I want to pay that right now, but if I do I'll definitely upload it. 

Thursday, October 11, 2012

Designing a Boost Converter

A company I'm interviewing with asked me to download a trial version of Multisim, a circuit simulation and analysis tool. I've been reviewing tutorials and familiarizing myself with the software. Recently I've taken the step to design my own circuit using the software. The type of circuit I decided to make was a Boost Converter.

Basic Idea


Boost Converters are circuits that increase the output voltage of a DC source. They do this by switching an inductor to charge and then by discharging it into a load. Since inductors store currents, their discharge voltages are theoretically indefinite. 
Basic Boost Converter Circuit. Source: Wikipedia. Public Domain Work
In the basic form of the circuit an inductor is used to store energy from the power supply. A switch alternates rapidly, switching the inductor between charging and discharging states. This provides intermittent  but higher voltage power to the load. A diode is used to keep any reactive elements in the load from reversing current supplied by the inductor.

I will break down the different parts of the circuit and design each portion piece by piece. 

Designing the Inductor Portion

Here I want to calculate charging times and maximum currents for this portion of the circuit. I'm going to assume a 6V source, 4 AA batteries. 
RL circuit. Source: Wikipedia, User: Splash. Licensed under a Creative Commons Attribution-Share Alike 3.0 Unported  license
To make this a real circuit, I've decided to model my inductor off a cheap, off the shelf inductor, I'm choosing this first, because an inductor will be the most expensive component, so I want to design the circuit around it. The inductor I choose was a 1.5 mH inductor with a maximum current of 160 mA. It costs $0.85.

To meet the current constraint, I must use an appropriate resistance to keep amperage down below 160 mA with a 6V DC source. Therefore no less than 37.5 Ω can be used. I'm going to use 50 Ω to be on the safe side. 

Based on that constraint, I want to determine how long it will take for the circuit to charge. It is generally agreed upon that 5 τ (time constants) is the time it takes to fully charge any circuit. In the case of an LR circuit, like the one I'm designing, τ = L/R. In this case Tau is 0.1857 ms. Therefor the switch must switch on for 0.1857 ms and off for another 0.1857 ms.


Simulation, in Multisim, of the basic RL charging circuit, showing charge times. 


Designing the Switch

No human can generate sub millisecond periods for a switch. Even if anyone could, why would they want to? We need to use an automated switching mechanism. For this I have chosen a BJT transistor, a voltage controlled current amplifier. This type of component, too is cheap, at $0.37 a part. 
BJT transistor. Source: Mouser Electronics
In the case of an NPN BJT a collector and emitter are used at the terminals of the switch, alternating voltage at the base is used to turn the switch on and off by bringing the transistor between saturation and cut-off modes. 

Simulation, in Multisim, of transistor switch mechanism
This is good, but there's still something I need: a waveform generator. In this simulation I'm using an idealized component, I need to make a real occilator. 

Designing the Occilator

To supply the BJT's base with a waveform, I'll use a cheap 555 based oscillator circuit. 

Square wave generator. Source: Next
The core component of this circuit, the 555 timer, can be found for $0.29. 

Simulation, in Multisim, of occilator
After fine tuning, the period of this timer was made to match that of the charging and discharge times of the RL circuit. 

Bringing it all together

Integrating the inductor, switching and occilator circuits, the final circuit looks like this. 
Finished Boost Converter circuit in Multisim
Here I put in a 1 MΩ load and a 1 microfarad capacitor to soften the voltage spikes out. 

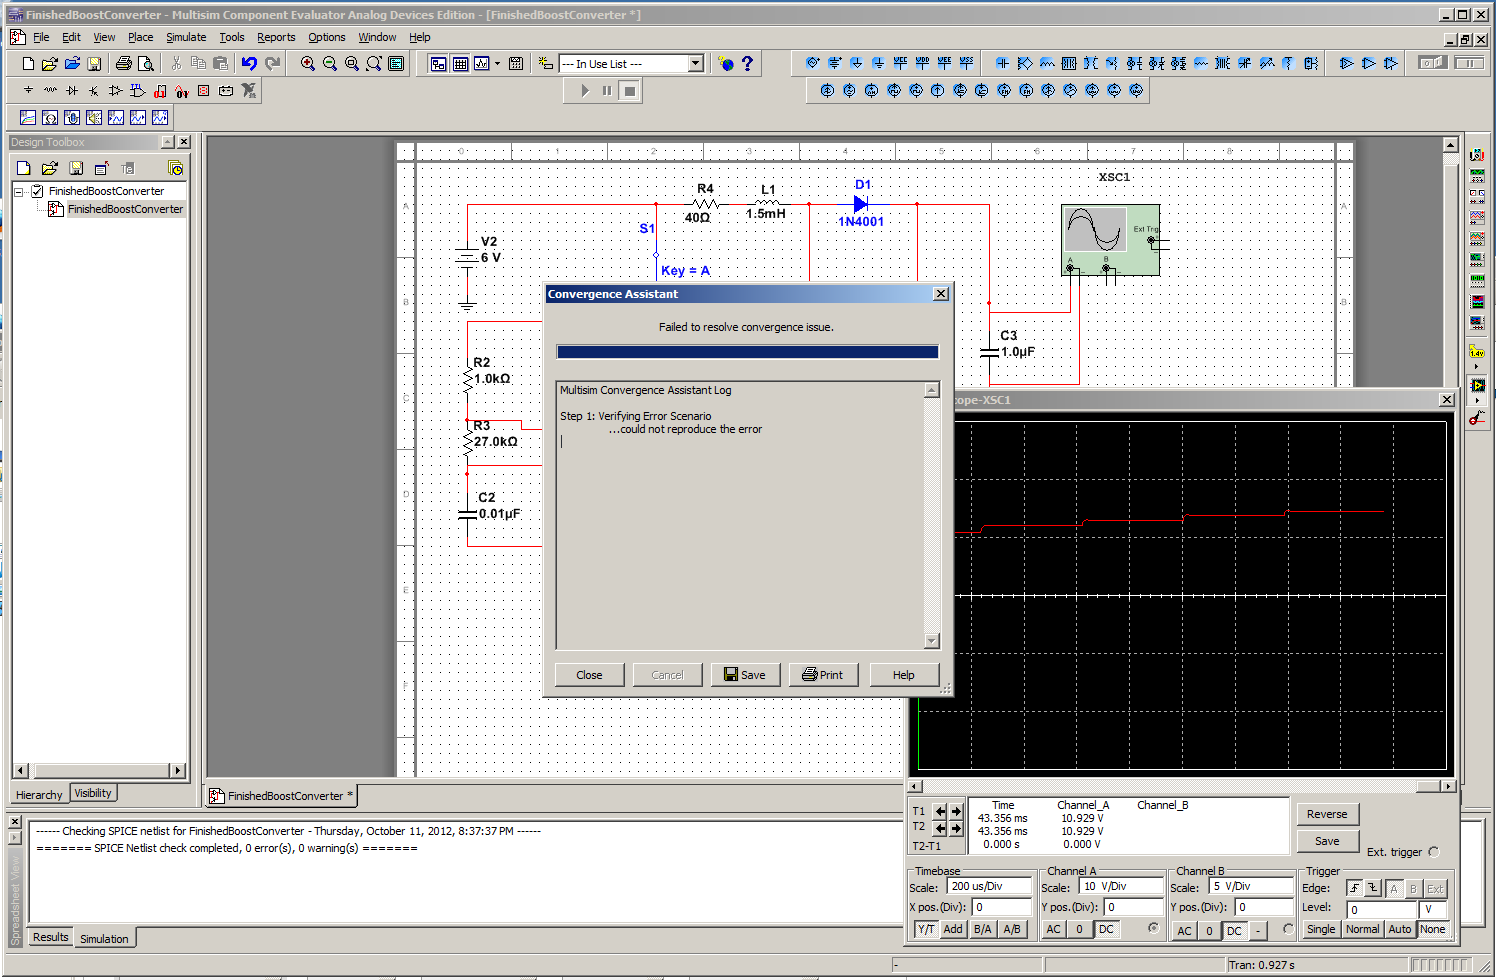
When I tried to simulate it, I ran into a non-descriptive error message. 
Derp
After pressing yes, I got this message. 

Durr Hurr
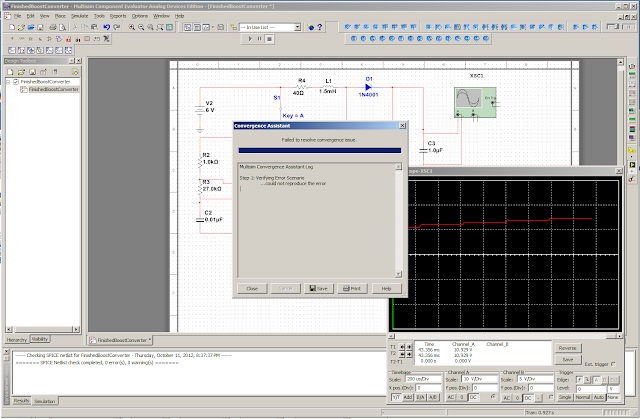
Despite these issues, I found that the simulator was able to simulate some of the circuit. 

Finished Boost Converter in Multisim
From that occiliscope output you can see the plot converging to about 14.5 V, more than twice the input voltage. 

Conclusion

This circuit can be made fairly inexpensively with off the shelf parts. Such as:
Total: $10.38

The Boost Converter can be used when high voltage is a priority over current, such as charging a capacitor to fire a camera flash, or to power nixie tubes that require high voltages but very little current. 

Monday, August 13, 2012

Javascript Canvas Hack

Last weekend I went to a hackathon in downtown Tucson. Together, with my team, we set out to make a social networking app based around creating and decorating a tile how ever you wanted.

The magic of the idea was that we would have a relevance algorithm that would arrange similar people's tiles together based on what was in the tile.

My job was to create the user interface that would allow users to simply add little stickies to their tile. Below I present the crude result of my 24 hours of effort.


What I made was a Canvas and Javascript hack to basically emulate a windowed graphical user interface. Users can add windows, move them, resize them, add text and delete them. I did this with little understanding of Javascript and no prior experience with canvas. 

You can download my hack. When you download it un-compress the file, inside there will be three files, a .js file, .css file and a .html file. To test it out: open index.html in a web browser.